EBB (EiBotBoard)
By: Brian Schmalz of Schmalz Haus
The EiBotBoard was originally designed for the Eggbot project (www.egg-bot.com). It is a small (2.2" x 2.2") two channel stepper motor driver board with USB microcontroller. It is based on the UBW board and supports all of the commands that the UBW does (for the most part), plus several extra, like stepper motor commands and RC servo output commands.
The idea with this board is to have a simple way to control two stepper motors from a PC over a USB connection. This is accomplished by two microstepping chopper stepper motor drivers and a small Microchip PIC microcontroller that has USB support. When you plug the EBB into a PC (Windows, Mac or Linux), it will show up as a serial port. You can easily type commands to it using a terminal emulator, or write your own application to send commands for moving the stepper motors. The Eggbot project has also developed a fantastic Inkscape extension that allows Inkscape to output (print) directly to the EBB.
The main command that gets sent to the EBB tells it to move the motors. This command (the "SM" command) will cause the motors to move in a straight line between two points on a plane. To make curved lines, just break the curve up into small straight line segments. Each movement is executed in a controllable amount of time, so you can control exactly how fast each move executes. The EBB does not understand G-code.
Different board version have different features as the requirements changed. This board has been evolving for almost a year and a half, with 5 versions designed and built. As it turns out, it takes awhile to get it right I guess!
The board was originally called EggBotBoard, for (hopefully) obvious reasons. As of hardware version 1.4, the name changed to EiBotBoard. As it turns out, this little board is good at doing WAY more than just plotting on eggs, so we didn't want to limit the scope of the board to just EggBots. Why Ei? Well, Ei is the German word for Egg, and we could keep the same acronym. Clever, no?


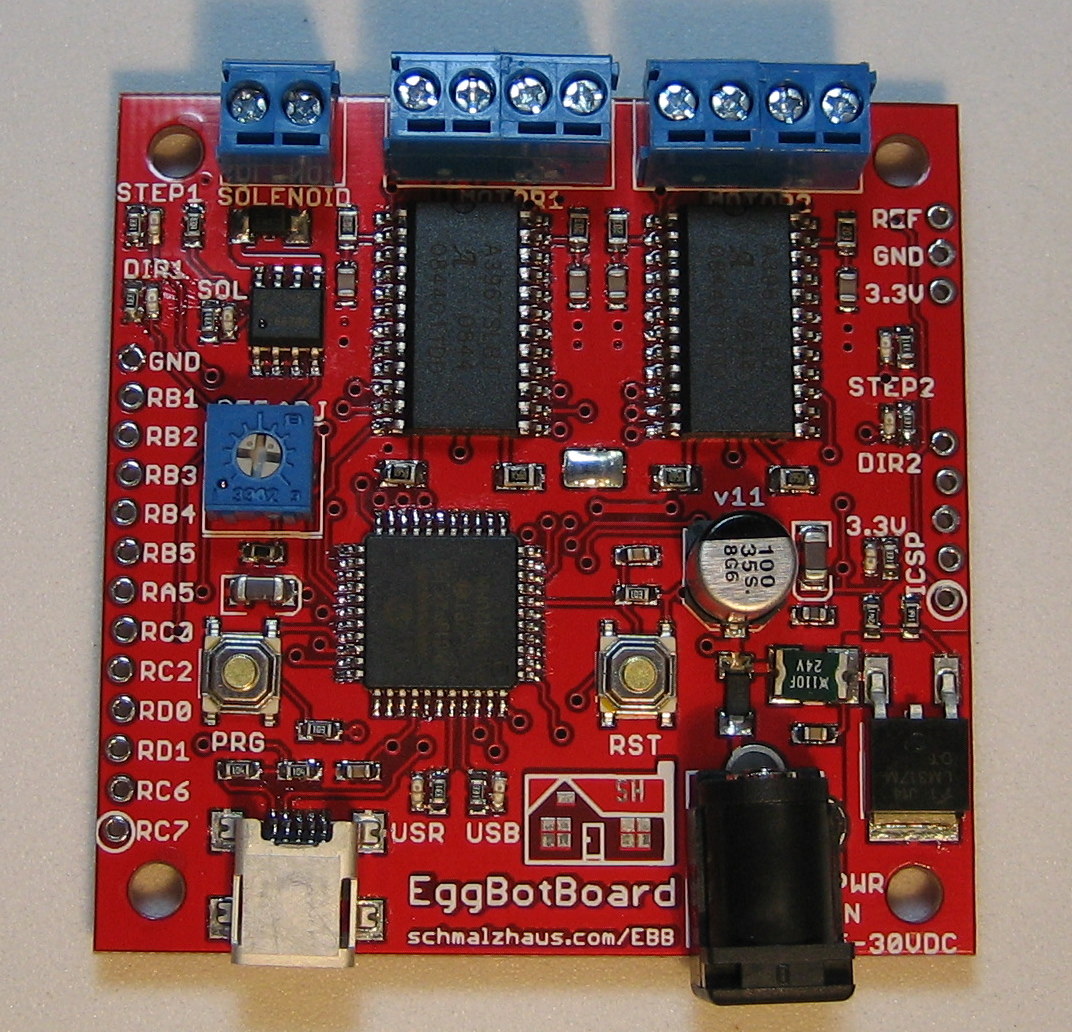
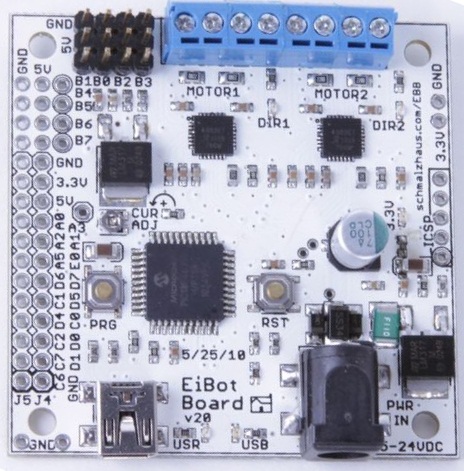
Version 1.1 on left - (first version to go with EggBots in 2009) and Version 2.0 on right, in white, sold by Evil Mad Science (Yours may also be red rather than white.)
This page is a documentation page for the EBB project. It includes design files, firmware versions, and source code for the EBB as well as documentation on the commands that the EBB supports.
For information on the EggBot kit by EMSL, please see their EggBot page . Note that you can buy just the white EBB v2.0 from EMSL.
You send commands to the EiBotBoard over USB, using either a custom application on the PC side (Like the Inkscape plugin that was written for EggBot) or a terminal emulator like TeraTerm, or your own program using a language like Liberty Basic or Processing. The commands are all simple ASCII and are all human readable. (And writable!)
All of the EBB commands are documented on the new and improved EBB Commands page. (Here is the old EBB Commands page for historical reference).
The EiBotBoard hardware consists of a PIC18F46J50 microcontroller and two Allegro A4983 stepper drivers, along with some voltage regulators and USB connection hardware. It takes 6-24V DC power input via the barrel jack connector. This directly powers the motor driver chips, and is then regulated down to 5V to supply power to the RC servos, and down to 3.3V to power the microcontroller. A current adjustment potentiometer allows you to set the maximum current allowed to the motors anywhere from 46mA to 1.25A per phase. Two push buttons allow for resetting the board and entering into bootloader mode (to update the firmware over USB). The EggBot kit also uses the PRG button to allow the user to pause plotting. Several LEDs indicate 3.3V power, stepper direction, and USB connection status. Screw terminals allow for the connection of many types of stepper motors, but they must either be four-wire motors or 6, 7 or 8 wire motors wired in bi-polar mode since the A4983s are bi-polar driver chips. A header along the edge of the board allows many extra I/O pins to be accessed for other uses in the future, and there are eight 3-pin connectors for RC servos or other digital I/O.
The EBB is being manufactured by EMSL. You can order one here (EMSL) .
The EiBotBoard Firmware supports all of the standard UBW commands, as well as several extra commands that are useful for plotting 2D images using stepper motors. These are all detailed on the EBB Commands page. The EBB comes standard with a USB bootloader (HID based so no drivers are necessary for bootloader mode) which allows for unlimited updating of the firmware using only a USB connection. The standard EBB firmware enumerates as a CDC device (i.e. virtual serial port) so any PC can interface with the EBB using any language.
After you buy an EBB, you may want to update to the most recent firmware version to get the newest features. (See the Release Notes page.)
The two LEDs on the EBB communicate different states of the firmware. You can use the LED blinking pattern to figure out what's going on (sometimes).
|
|
USR LED (Red) |
USB LED (Green) |
|
EBB enumerated and communicating with PC over USB |
Off |
Slow Flash |
|
EBB not enumerated with PC |
Off |
Fast Flash |
|
USB HID Bootloader mode active |
Alternating w/USB |
Alternating w/USR |
There have been a number of versions of EBB hardware and software (firmware). Please see this page describing the various versions. Only the latest version of each is documented on this main page.
The following zip file contains just the EBB driver INF file. This INF file must be used the first time the EBB is plugged into a Windows computer. It tells Windows what driver to use with the board, and it contains unique strings that identify the board as an EiBotBoard from SchmalzHaus.
This INF file will work for all versions of EBB Firmware. However, any version of EBB Firmware 1.8.2 and above MUST use this custom version of the INF file, not the generic one that comes from Microchip.
If you don't want to mess with a raw INF file, here is a simple installer created by Microchip to install the EBB driver on any Windows system. There are two ways you can download it - as a zip file or directly as an executable.
NOTE: This installer REQUIRED the .NET runtime framework v3.5 (v4 does not work for some reason). Most Windows machines have this already. If you get an error when trying to run the installer, you can download .Net 3.5 from here.
If you ever build your own EBB, or if you need to re-program a part from scratch, you'll need the bootloader images. Please see the EiBotBoard Bootloader information page for hex files and more.
By far the simplest way to update the firmware on your EBB is to follow the fantastic instructions that EMSL has posted here:
https://wiki.evilmadscientist.com/Updating_EBB_firmwareInstead, if you want to update manually, you can follow these older instructions:
You'll need a Windows PC (XP, Vista and Windows 7 supported, I believe), a USB cable, a power supply for your EBB (for boards earlier than v1.3), the latest version of .Net (if you get an error while bootloading, updating your version of the .Net runtime may be the cause) a HEX file from above that you want to program into your EBB, and this program.
If you want to update your firmware and you're on Mac OS or Linux (or Windows too) you can follow the instructions here to use a command line tool to perform the update.
Questions? E-mail me at brian@schmalzhaus.com
EggBotBoard by Brian Schmalz is licensed under a Creative Commons Attribution 3.0 United States License .
Based on a work at www.schmalzhaus.com/EBB .
Permissions beyond the scope of this license may be available at www.schmalzhaus.com/EBB .