Getting Started:
Running the “Host – Printer – Print Screen Demo”
Required
Hardware:
To run this project, you will need one of the
following sets of hardware:
Configuration 1:
Explorer 16
Explorer
16
(DM240001)
USB
PICtail™ Plus Daughter Card
(AC164131)
Graphics
PICtail™ Plus Board with 3.2” Display kit (AC164127-3)
And
one of the following PIMs
PIC24FJ256GB110 Plug-In-Module (PIM) (MA240014)
PIC32MX USB Plug-In-Module (PIM) (MA320002)
dsPIC33EP512MU810 Plug-In-Module
(PIM)
PIC24EP512GU810 Plug-In-Module (PIM)
Configuring the Hardware:
This
section describes how to set up the various configurations of hardware to run
this demo.
Configuration 1: PIC24FJ256GB110 PIM + Explorer 16
Configuration
1: Explorer 16
1)
Before attaching the PIC24FJ256GB110 PIM to the Explorer 16 board, insure that the
processor selector switch (S2) is in the “PIM” position as seen in the image
below.
.JPG)
2)
Short the J7 jumper to the “PIC24” setting
.JPG)
3)
Before connecting the PIC24FJ256GB110 PIM to the Explorer 16 board, remove all
attached cables from both boards.
Connect the PIC24FJ256GB110 PIM to the Explorer 16 board. Be careful when connecting the boards to
insure that no pins are bent or damaged during the process. Also insure that the PIM is not shifted in
any direction and that all of the headers are properly aligned.
4) On the USB PICTail Plus board, short jumpers
JP2 and JP3. Remove all other shorts on
the board.
.JPG)
5) Connect the USB PICTail Plus board to either
of the female PICTail Plus connectors or on the card edge connector (J9) at the
edge of the Explorer 16 board.
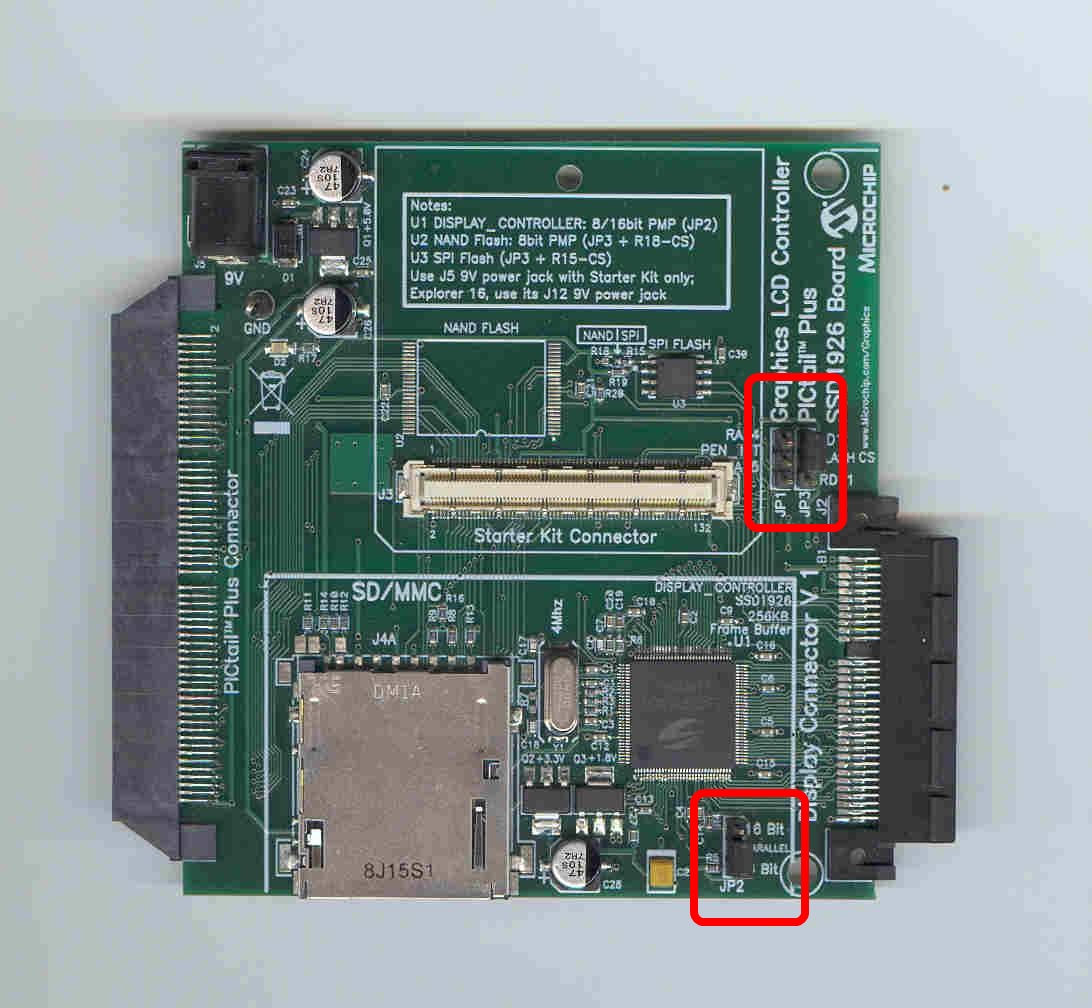
6) Configure the SSD`926 Board with the
following settings: Set the “parallel” jumper setting set to 8-bit and set the
“flash cs” to RD1. Leave the PEN_INT
jumper open:
To
run this project, you will need to load the corresponding firmware into the
devices. There are two methods available
for loading the demos: Precompiled demos and source code projects.
Precompiled
Demos are available in the “<Install Directory>\USB – Precompiled Demos”
folders. Each demo should be prefaced
with the hardware platform it is compiled for.
Select the file that matches the hardware that you have and the demo
that you want to run. For more
information about how to load a precompiled project, please see the “Getting
Started – Loading a precompiled demo” guide.
The
source code for this demo is available in the “<Install
Directory>/USB/Host – Printer – Print Screen Demo” directory. In this directory you will find all of the
user level source and header files as well as project and workspace files for
each of the hardware platforms. Find the
project (*.mcp) or workspace (*.mcw) file that corresponds to the hardware
platform you wish to test. Compile and
program the demo code into the hardware platform. For more help on how to compile and program
projects, please refer to the MPLAB® help available through the help menu of
MPLAB (Help->Topics…->MPLAB IDE).
The
first step required before running this demo is to calibrate the touch
screen. Touch screen calibration is done
by holding the touch screen down and power cycling the board. This will bring you to the touch screen
calibration screen.
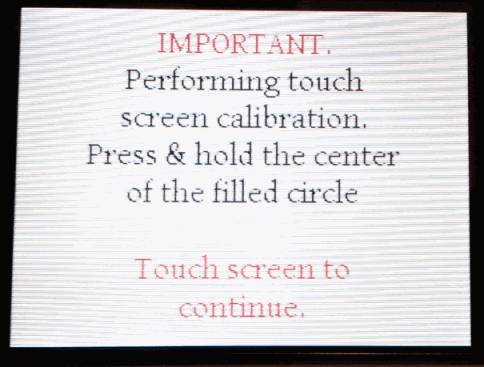
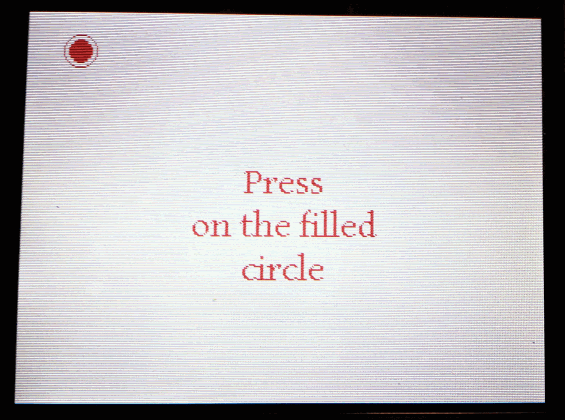
Follow
the instructions on the screen.
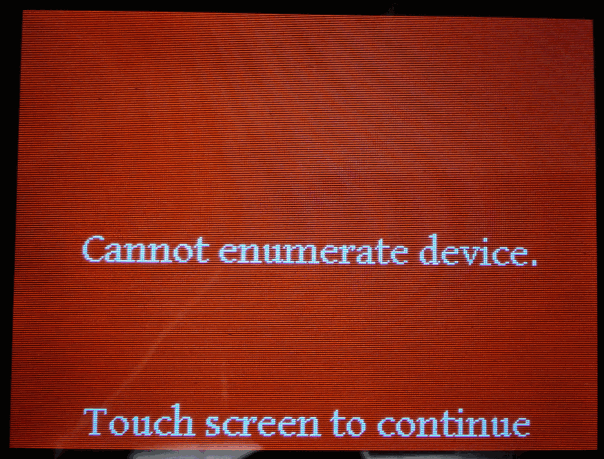
Once
the touch screen calibration is complete, plug in a printer into the board and
reset the board. If the following screen
comes up, then the printer that was plugged in is not supported or there is no
printer plugged in. Please plug in a
printer and reset the demo.
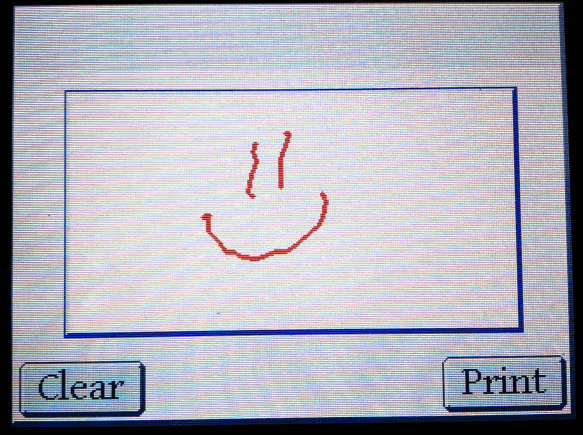
If
the printer is successfully loaded then the following screen should come
up. You can then draw on the screen and
press print. When you press print the
attached printer should print exactly what is on the screen and clear the
screen.
Trademarks:
The Microchip name and logo, the
Microchip logo, MPLAB, and PIC are registered trademarks of Microchip
Technology Incorporated in the U.S.A. and other countries.
PICDEM is a trademark of
Microchip Technology Incorporated in the
Microsoft, Windows, and Windows
Vista are either registered trademarks or trademarks of Microsoft Corporation
in the